Fix Und Foxi Figuren: How to Repair, Restore and Protect Kauka Collectables
Fix Und Foxi Figuren: How to Repair, Restore and Protect Kauka Collectables
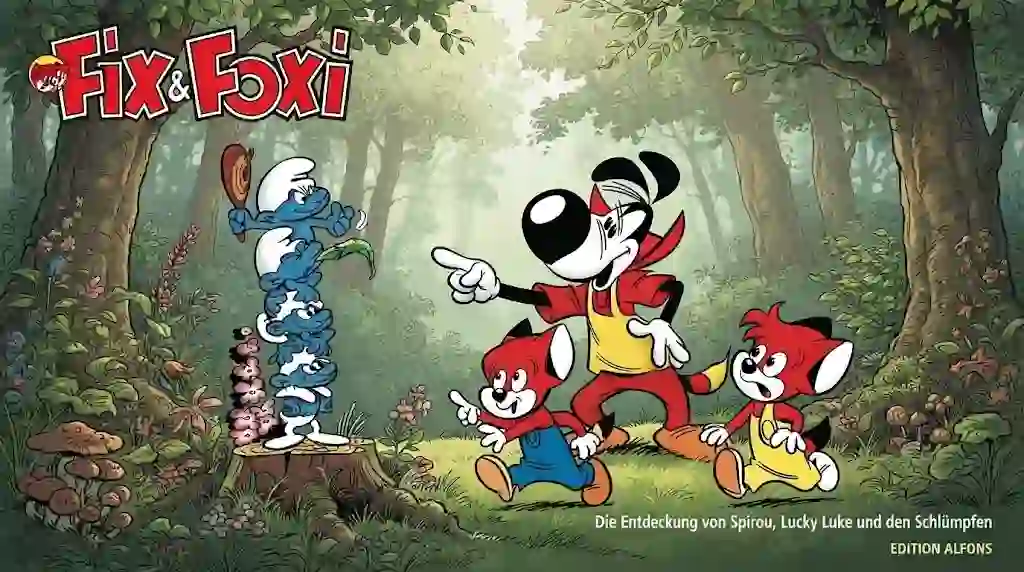
Your Foxi stands on the shelf with one arm dangling by a thread of paint. Lupo feels tacky under your thumb and leaves a shiny mark on the glass. The 20 cm rubber Mausi squeaker split along the seam somewhere in the attic, and nobody knows which workshop pressed it. Broken fix und foxi figuren sell for a few euros. Untouched originals from the same mould regularly clear twenty times that. Between those two prices sits one decision: repair it properly, or make it worse.
This guide is a workshop manual for Kauka collectables. You will learn who made your figure, what damage that maker’s material attracts, which adhesive and paint actually bond to 1960s hard PVC or hollow rubber, how to clean without stripping 60-year-old hand paint, and how to store the piece so the repair lasts. Every method below is chosen for reversibility first, strength second.
What Counts as Fix und Foxi Figuren: Know Your Object First
Rolf Kauka’s comic universe started inside Till Eulenspiegel in 1953, and the foxes took over the magazine’s name by issue 29 in 1955. The weekly ran for four decades and reached circulations near 400,000 copies, which is why licensed toys flooded German toy shops from the late 1950s onward. That licensing history explains the mess collectors face today: the same character appeared as a hard plastic miniature, a hollow rubber squeaker, a promotional keyring and a plush, often within a few years of each other.
Before you touch a repair, place your figure in one of four families. The material decides everything that follows.
- Hard PVC miniatures (4–8 cm). Mostly Heimo, plus Bullyland, Fuchs and Fischer lines. Crisp detail, matte or gloss hand paint, usually a maker’s mark on the base.
- Hollow rubber and vinyl squeakers (14–28 cm). Listed in German trade catalogues as Quietschfiguren or Stop figures, produced by ELA, JOHN Thermoplastik, Fischer and others. Soft, flexible, prone to seam splits and plasticiser bloom.
- Large vinyl and rubber display figures (20–25 cm). Often carry a “Rolf Kauka Produktions” style imprint and a moulded base.
- Licensed promotions. The McDonald’s 2000 series (about 9–12 cm, made in China, some with movable arms or whistles) and ZEK GmbH figures sold with small flags. These are plentiful and cheap, so heavy restoration rarely pays.
Plush is its own category. Schuco’s Bigo Bello Fix und Foxi soft toys, around 24 cm, need textile care, not plastic care, and a later 1991 plush fox exists too.
Fix und Foxi Figuren Makers: Identification, Marks and Dating
Dating a figure comes down to marks, material and paint style. Heimo is the best documented maker: the company produced hand-painted figures from roughly 1950 to 1980, grew out of a cooperation with the American firm Marx, and stamped many pieces with a cross inside a circle. Heimo rarely dated its figures, so collectors date them by mould detail and paint palette instead.
| Maker / line | Typical material | Size range | How to spot it | Era | Repair notes |
|---|---|---|---|---|---|
| Heimo | Hard PVC, later hard rubber | 5–8 cm | Cross-in-circle logo, “R. Kauka” or character name on base, sharp hand paint | 1950s–1980s | Bonds well with gel CA; solvent cements designed for polystyrene will not grip |
| ELA / JOHN Thermoplastik | Hollow soft vinyl or rubber | 14–28 cm | Squeaker valve in the base or back, seam line around the body | 1960s–1970s | Needs flexible adhesive; rigid glue snaps at the joint |
| Fischer | Soft vinyl, rubber | 10–25 cm | Moulded Kauka credit, soft matte paint | 1960s–1970s | Clean dry; water pools inside hollow bodies |
| Fuchs | Plastic / PVC | 5–10 cm | Character name moulded on base, family groupings (Pauli) | 1960s–1970s | Thin limbs; pin the break before gluing |
| Bullyland | PVC | 5–9 cm | Bullyland mark, brighter later paint | 1970s–1990s | Modern paints; easy touch-up |
| ZEK GmbH | PVC | 4.5–8 cm | Sold with flags, sometimes boxed | circa 2000 | Low value; stabilise only, do not repaint |
| McDonald’s licence | Plastic, “Made in China” | 9–12 cm | Happy Meal moulding, moving arms, whistle fittings | 2000 | Widespread; repairs are cosmetic only |
| Schuco (Bigo Bello) | Plush, synthetic fur | about 24 cm | Schuco label, stitched features | 1980s–1990s | Textile conservation, never machine wash hot |
| Goebel / porcelain style | Rubber or ceramic-bodied | 6–10 cm | Numeric mould mark (for example 4516) | circa 1960 | Treat like ceramics; epoxy for chips |
Three quick checks tell you more than any price guide: read the base imprint under raking light, weigh the figure (hollow rubber feels shockingly light), and press a fingernail into an unpainted spot on the underside. Hard PVC dents and springs back. Degraded soft vinyl stays dented and feels greasy.
The Damage Map: What Goes Wrong With Kauka Figures
Vintage fix und foxi figuren fail in predictable ways, and each failure has a different cause.
- Snapped limbs. Thin wrists, ankles and ear tips on hard PVC miniatures break when the plasticiser has slowly left the material over decades.
- Stress cracks and crazing. A fine web of hairline cracks in the paint layer, usually across shoulders and hips where the mould created thin walls.
- Sticky, weeping surfaces. Old PVC migrates its plasticiser to the surface. The figure feels tacky, collects dust, and can stain paper, textiles and wooden shelves on contact.
- Paint loss and rubbing. Hand paint on 5 cm figures wears first at the eyes, muzzle and boots, exactly where children handled them.
- Yellowing. Pale cream, white and clear parts drift toward yellow under light and heat. Red and orange paint can shift at the same time.
- Seam splits on hollow bodies. Rubber squeakers open along the mould seam, often after being squeezed or stored under weight.
- Corrosion and grime in fittings. Metal whistles, keyring rings and spring-loaded parts rust and seize.
- Plush problems. Mattened fur, split seams, missing or cracked safety eyes, and occasionally moth damage.
Museum conservators describe the sticky stage bluntly: dust sticks to migrating plasticiser, and cleaning that crust off a degraded surface is difficult to impossible without causing more damage. That single sentence should shape your whole approach — clean less, clean gentler, and isolate the sick figures from healthy ones.
The Repair Toolkit for Fix und Foxi Figuren
Buy once, use for the entire collection. Nothing here is exotic.
- Adhesives: gel cyanoacrylate for clean hard-plastic breaks, a two-part epoxy for load-bearing joints, and a flexible polyurethane or rubber-grade adhesive for hollow vinyl and rubber.
- Reinforcement: 0.5–0.8 mm brass rod or stainless pins for “pinning” broken limbs, plus a pin vice.
- Fillers: two-part epoxy putty for missing chips; a fine acrylic filler for shallow paint craters.
- Cleaning: pH-neutral conservation soap or plain dish soap, distilled water, soft goat-hair and nylon brushes, cotton swabs, 70% isopropyl alcohol for spot tests only.
- Paint: water-based acrylic model paints, a sable size 0 and size 00 brush, matte and satin varnish with UV inhibitors.
- Finishing: wet-and-dry paper from 600 to 2000 grit, micro-mesh pads, masking tape, magnifier with light.
- Safety: nitrile gloves, eye protection, a respirator rated for organic vapour when you use solvents or epoxy, and a well-ventilated bench.
Keep a dedicated tray per figure with its parts, screws and pins. Small ears vanish into carpet faster than you can blink.
Step 1: Assess, Document and Decide Whether to Touch It
Photograph the figure from eight angles before anything else, with a scale ruler in one frame. That record proves condition for insurance, protects you in a sale, and lets you compare results after the work.
Then grade honestly:
- Mint: no wear, original paint intact. Do nothing. Dust only.
- Excellent: light rub wear. Clean, no repainting.
- Good: visible paint loss, no structural damage. Clean and consider a partial touch-up.
- Fair: cracks, loose limbs, sticky surface. Stabilise, then restore conservatively.
- Poor: major breaks, missing parts, heavy crazing. Rebuild for display only, or sell as a project.
Two rules decide the rest. First, rare and complete pieces lose value when you overwork them; a full repaint can wipe out half the market price, while a disclosed, invisible structural repair often leaves value nearly intact. Second, anything you do must be reversible or at least documented. Write the treatment on an acid-free card and store it with the figure.
Step 2: Clean Without Destroying 60-Year-Old Paint
Cleaning sequence for hard PVC miniatures:
- Dry-brush loose dust with a soft goat-hair brush. Never wipe a gritty surface — you will scratch the paint.
- Mix a few drops of pH-neutral soap in lukewarm distilled water. Lukewarm, not hot: heat softens PVC and can warp thin limbs.
- Work one area at a time with a barely damp nylon brush, then lift the dirt with a cotton swab. Keep water away from base seams and hollow bodies.
- Rinse by dabbing with a swab dipped in clean distilled water. Do not submerge squeakers.
- Dry on a towel in open air for 24 hours before any adhesive or paint touches the surface.
For stubborn grime, test 70% isopropyl alcohol on a hidden spot — the underside of the base — and wait ten minutes. If paint softens or lifts, stop. Solvents and surfactants can dissolve some plastics outright and pull plasticisers and stabilisers out of PVC and rubber, which is why conservators push mechanical cleaning ahead of chemistry every time.
Sticky plasticiser bloom needs its own handling: wipe the exudate with a dry tissue rather than water, then store the figure sealed in a polyethylene bag with silica gel. Sealed storage keeps the escaped plasticiser’s partial pressure around the object and slows further migration.
Step 3: Rejoin Broken Arms, Legs and Ears
Clean breaks on hard PVC are the easiest repair in this hobby.
- Dry-fit both halves and confirm the break is clean and unpainted inside.
- Degrease the fracture faces with a dry swab; skip alcohol if the paint near the break is fragile.
- Apply a tiny bead of gel cyanoacrylate to one face only, press together for 30–60 seconds, and hold alignment with a small clamp or masking tape.
- Let it cure undisturbed for 24 hours. Gel CA reaches handling strength in seconds but full strength in a day.
- Clean any white blush (blooming) with a swab and a little isopropyl alcohol, then feather the seam with 1000-grit paper.
For a wrist, ankle or ear that carries weight, pin the joint. Drill 2 mm deep into each side with a pin vice, glue in a short brass rod, then close the break over it. The pin takes the shear load; the glue only holds alignment.
Hollow rubber and soft vinyl refuse rigid glue — a hard CA joint snaps the next time the figure flexes. Use a flexible polyurethane adhesive or a rubber-grade contact cement, roughen both faces very lightly with 600 grit, clamp with padded jaws, and give it a full 24–48 hours. For long seam splits, apply the adhesive along the seam, press closed, and support the body on a shaped cradle of acid-free tissue so the wall does not dimple while it cures.
Step 4: Fill Chips, Rebuild Missing Details and Sand Invisible
Missing material needs a filler that sands and paints. Two-part epoxy putty is the workhorse: knead equal parts, press into the chip slightly overfilled, shape with a damp silicone tool before it skins over, and let it harden fully before sanding.
Sanding sequence: 600 grit to level, 1000 to refine, 2000 wet to polish, then micro-mesh. Sand only the repair, never the surrounding original paint. Blow the dust away with a bulb blower and wipe with a tack cloth.
Deep detail loss — a missing ear tip, a broken-off tail, a lost nose — is better rebuilt from a reference photograph than guessed. Print a same-scale image of the correct character, lay tracing paper over the model, and check proportions before you commit filler. Kauka’s studio drew the same faces for decades, so proportions are consistent across makers.
Step 5: Repaint and Colour Match Like a Conservator
Repainting is where value dies fastest, so treat it as spot work, not a makeover.
- Photograph the original colour in daylight and against a grey card.
- Mix your match with water-based acrylics on a palette, testing on a piece of white plastic or the hidden base first.
- Thin the paint to a translucent wash and build colour in three to four thin coats. One thick coat looks like a repair; thin layers look like paint.
- Paint inside the loss only, using a size 00 brush and a magnifier. Feather the edge outward with an almost dry brush so no hard line remains.
- Seal with a matte or satin varnish containing UV inhibitors, matched to the surrounding sheen. Heimo’s 1970s finishes are usually matte; glossy varnish on a matte figure reads as a repaint from a metre away.
Colour notes for the Kauka cast: Fix and Foxi are warm orange-reds with cream muzzles, Lupo is a grey-tan wolf, Oma Eusebia often carries a purple skirt, and Pauli is a grey-brown mole. Mix toward slightly duller and dustier than you think — 1970s pigments aged, and a fresh bright red next to a faded original screams at collectors.
One safety note worth repeating: pre-1980s toy paint can contain lead. Wet-sand rather than dry-sand wherever possible, wash your hands after handling, keep the work away from food and children, and use a lead test swab before you grind into any unknown coating.
Step 6: Yellowing, Sticky Surfaces and Plastic Degradation
Hydrogen peroxide treatments — the “retrobright” bath under sunlight or a UV lamp — do reverse yellowing in many plastics, and collectors report the effect can be dramatic. They also come with real costs: the yellowing tends to return over time, and peroxide can lift paint and shift reds toward orange. On a painted 5 cm Kauka miniature, that risk is not worth the reward.
A safer path for pale, yellowed areas:
- Keep the figure out of direct light from now on. Yellowing is a light-and-heat reaction, so slowing it beats reversing it.
- Clean gently; much of what looks like yellowing on dusty figures is oxidised grime, not the polymer.
- If the piece is unpainted cream or white and structurally sound, test peroxide on one small hidden area at 3% strength, wrapped in clear film, under indirect daylight, checking hourly. Stop at the first sign of surface change.
- Document the attempt. If you do treat a figure, disclose it when you sell.
Sticky figures are a storage problem more than a cleaning problem. Isolate them, keep them supported so soft walls do not slump, and interleave them with non-stick sheets rather than foam or paper, both of which stain on contact.
Step 7: Plush Fix und Foxi Figuren: Textile Care
Schuco-style plush foxes need a different bench entirely.
- Surface clean with low suction through a fibreglass mesh screen so the vacuum never touches the fur.
- Lift matting with a soft slicker brush, working with the pile, not against it.
- Spot-clean with foam from a mild detergent, applied with a cloth, then blot dry. Test on an inner seam first.
- Hand wash only when the stuffing and seams are sound, in cool water with a textile-safe detergent, and dry flat away from heat and sun. Never machine dry.
- Re-stitch split seams with matching polyester thread and a ladder stitch so the repair hides inside the seam allowance.
- Replace cracked eyes with new safety eyes and washers of the same diameter, and keep the originals in the documentation envelope.
Fix und Foxi Figuren Value: What Repairs Protect and What They Cost
Prices below reflect what German marketplaces show for individual figures, not guarantees. Condition and rarity move every number.
| Damage | Repair method | Typical material cost | Time | Effect on value |
|---|---|---|---|---|
| Clean snapped arm or ear | Gel CA, pinned | €8–€15 | 30 min + 24 h cure | Neutral to positive when disclosed |
| Loose or wobbly limb joint | Epoxy reinforcement, pinning | €10–€20 | 1–2 h | Positive; restores display stability |
| Small paint chip | Spot repaint, varnish | €15–€25 | 1–2 h | Slight loss if visible, neutral if invisible |
| Seam split on hollow squeaker | Flexible adhesive, cradle cure | €12–€25 | 2 h + 48 h cure | Positive; prevents tearing further |
| Sticky plasticiser bloom | Dry wipe, sealed storage with silica | €5–€10 | 20 min | Positive; stops staining other objects |
| Yellowed pale plastic | Light control, optional peroxide test | €0–€30 | hours to days | Neutral at best, risky on painted areas |
| Full repaint | Strip and respray | €40–€80 | 1–2 days | Often cuts value by half or more |
| Missing part rebuilt | Epoxy putty sculpt, paint match | €20–€40 | half a day | Neutral if documented, negative if faked |
| Plush seam and eye repair | Hand stitch, replacement eyes | €10–€20 | 1–2 h | Positive on collectable Schuco pieces |
Common 5 cm Heimo figures typically trade between €2 and €20. Rarer characters and variants — a Pauli from the 1970s, an Onkel Fax with intact bow tie and trousers, a single-colour unpainted Lupo blank — sit in the €15 to €40 band. Large 20–25 cm squeakers and display figures range from €15 to €50, with clean examples at the top. McDonald’s 2000 figures and boxed ZEK pieces usually stay under €10 unless they are sealed. A genuine 1960s rubber figure with a mould number can exceed €60, and a mint large Lupo with no paint loss has fetched several hundred euros in private sales.
How to Spot Reproductions, Repaints and Wrong Parts
Fakes in this niche are rare; bad restorations are common. Check these tells before you buy:
- Paint freshness. A 1970s figure with perfectly crisp, slightly glossy, un-cracked paint has been repainted. Original hand paint shows micro-cracking and edge wear at contact points.
- Base marks. Mismatched font depth, a blurred cross-in-circle, or a moulded mark that sits proud of the surface suggests a later casting.
- Proportions. Replacement limbs from another maker rarely match the shoulder angle or paw size of the original sculpt.
- Smell and feel. Strong chemical or greasy surfaces signal active plasticiser migration or a fresh solvent-based repaint.
- Weight. Resin and modern re-casts weigh differently from period PVC and hollow rubber.
- Documentation. A seller who shows before-and-after photos and names the treatment is selling honestly. One who only shows glamour shots is not.
Storage, Display and Long-Term Protection
- Keep figures at roughly 18 °C and 45–55% relative humidity, stable rather than swinging.
- Store away from direct sunlight and bright indoor lighting; UV is the main driver of yellowing and paint fade.
- Use inert plastic boxes (polyethylene or polypropylene), acid-free tissue and non-fibrous interleaves. Avoid foam, newspaper, rubber bands and PVC sleeves.
- Support hollow figures upright with tissue cradles so soft walls do not creep and deform.
- Bag sticky or weeping figures individually and label them, so one sick figure does not damage the shelf.
- Dust quarterly with a soft brush; dust on degraded surfaces turns into permanent abrasion.
- Photograph the collection yearly. Insurance claims and sales both depend on records.
Where to Find Parts, Donors and Expert Help
- German marketplaces and auction sites carry the widest stock of single figures, which makes them the cheapest source of donor limbs for a pin-and-glue rebuild.
- Collector forums and Kauka fan communities are the fastest route to a correct reference photograph, a maker identification or a warning about a bad reproduction.
- Toy fairs in southern Germany regularly surface unlisted Heimo blanks and single-colour figures.
- For high-value pieces, a private conservator who works with plastics and modern materials will charge more than a hobby repair, but will keep the object’s market integrity intact.
- The current licence holder for the Kauka characters, Rolf Kauka’s Comicosmos, is the right contact if you plan to produce or sell anything new under the brand — repairing and reselling original vintage figures you own is a different matter from manufacturing reproductions.
Frequently Asked Questions About Fix und Foxi Figuren
What is the best glue to fix und foxi figuren made of hard plastic?
Gel cyanoacrylate is the best everyday choice for clean breaks in hard PVC Kauka miniatures. Apply it sparingly with a toothpick, hold the parts for a minute and let the joint cure for 24 hours. Pin the break with a short brass rod if the limb carries weight, and use a two-part epoxy instead of glue for joints that flex.
How do I repair a sticky or greasy vintage Kauka rubber figure?
Wipe the sticky surface with a dry tissue — not water — to lift the migrated plasticiser, then store the figure sealed in a polyethylene bag with silica gel. Sealed storage slows further weeping. Keep it off paper, textiles and wood, support it so soft walls do not sag, and repair any split seams with a flexible polyurethane adhesive rather than rigid super glue.
Can I repaint a fix und foxi figur without losing its collector value?
Yes, if you limit yourself to spot repairs inside the paint loss, match the colour in thin translucent layers and seal with a matte varnish. A full repaint is the fastest way to lose value, often half the price or more. Photograph the original condition, keep a treatment note with the figure, and disclose the work honestly when you sell.
How can I tell if my fix und foxi figure is an original Heimo piece?
Turn it over and look for a maker’s mark: Heimo used a cross inside a circle, often with the character name or a Kauka credit moulded into the base. Check the material — Heimo worked in hard PVC and later hard rubber, with sharp hand-painted detail and a solid feel. Compare the sculpt against a dated reference photograph, since Heimo did not stamp production years.
Are old fix und foxi figuren safe for children to play with?
Treat vintage figures as collectables, not toys. Paints applied before the 1980s may contain lead, and small ears, limbs and whistles are a choking hazard. If you must test a coating, use a lead test swab before sanding, wet-sand rather than dry-sand, wash your hands afterwards and keep the work away from food. Display restored pieces behind glass or on a high shelf.
How much are fix und foxi figuren worth today?
Common 5 cm figures generally sell for €2 to €20, rarer 1970s characters and single-colour blanks reach €15 to €40, and large 20–25 cm squeakers run €15 to €50 depending on paint. McDonald’s 2000 and ZEK promotional figures usually stay under €10. Condition, completeness and an intact maker’s mark decide where a piece lands inside those bands.
Restore the Shelf, Not Just the Figure
Pick one figure today — the Foxi with the loose arm, the squeaker with the split seam — and run the full sequence on it: photograph, clean, join, fill, spot-paint, seal, document. That single piece teaches you more about your whole collection than any price list, and the skill carries over to every other Kauka figure in the box.
Share your before-and-after photographs with the collector community, and you will get identifications, warnings and donor parts in return. That exchange is how this niche survives: the comics stopped printing decades ago, but the toys keep coming back to life on kitchen tables across Germany. Start with the worst one on your shelf. Then come back and tell us what it turned out to be.
About the author: Written by a restoration practitioner who has spent over a decade repairing, cleaning and re-painting German comic collectables from the Kauka studio era — Heimo miniatures, hollow rubber squeakers and licensed plush. Every method described here has been bench-tested on period PVC, vinyl and rubber, and graded against resale outcomes. Treatment notes, reference photographs and material safety data accompany each project.